It’s been quite awhile since I’ve posted activities the kids do here at home. Since they started preschool last year, arts and craft time has been few and far in between. This week, we’re going to re-do a craft we did a couple of years back. What’s more fun is that we’re doing it with their classmates in school!
For the kids’ birthday celebration this year, I coordinated with their teachers and prepared Li’l Einsteins themed activities for their school. I’ll tell you more about that and how I kept party expenses (food, theme cake, crafts, prizes and lootbags all included) below 7K in another post. For now, let me share with you what we did with a couple of plastic plates, a spoonful of beans, and some yarn.
BEAN SHAKERS
Since Little Einsteins aims to teach kids art and music appreciation, I decided to have the kids make their own shakers for our arts and crafts activities. You can easily make these at home with your own little ones since the materials are most likely already available in your home.
Recyclable plastic plates or bowls, at least a meter of yarn or any string, a tablespoon or two of uncooked beans (we used monggo) and a puncher for putting holes around the plates or bowls.
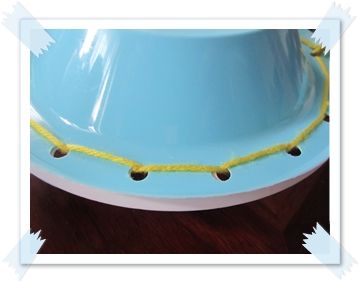
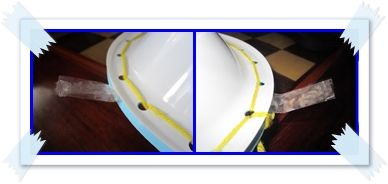
The first thing you need to do is to punch hole around the plate or bowl. Try to make the spaces between the holes as equal as possible. The plates we used had a design on the rim which provided a good guide for me.
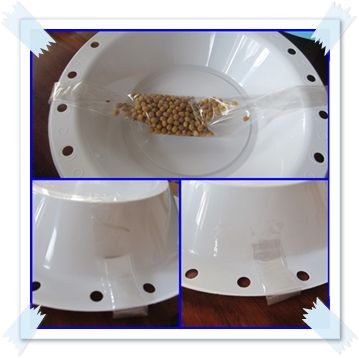
Next, place the monggo beans inside a tube plastic or a sheet of paper folded into a width of 1″. Tape both ends of the plastic or paper on the outer part of the plate. Of course, you can always just scoop the beans onto the plate but my kids are still preschoolers so doing this keeps all the beans secure while they weave the plates together.
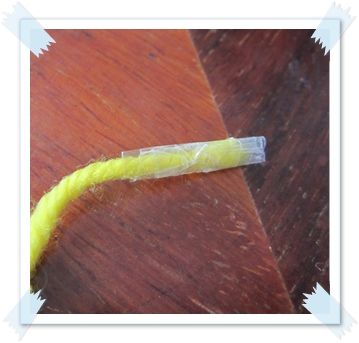
wrapping one end of the yarn with tape makes it easier to weave through the holes
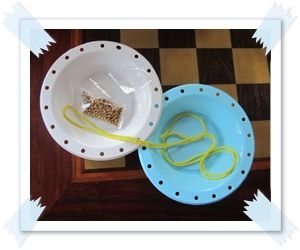
Then, put the two plates together and align the holes. Weave the yarn through the holes securing the two plates together. I was pressed for time doing this sample so I opted to just weave straight through the holes. You can make your own pattern and weave diagonally or however way you want to. The important thing is to secure the two plates together so the beans would not fall out.
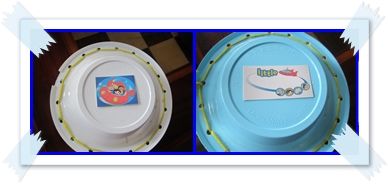
Once you finish weaving the plates together, remove the tapes of the plastic that’s keeping the beans in place. Pull the plastic out from the closed end to scatter the beans inside.
Ta-da! You now have a shaker to make fun music with!
This is so crafty. I will try nga this with my son 🙂 Thank you for sharing.
Mommy Maye, you may want to use bigger beans instead. Or make sure the yarn is laced around the plate securely. Nagka “bean spill” sa school coz some of the kids’ lacing were a bit loose. 😛 Nagkalat tuloy sa school.